🥢 Homemade Spring Rolls – A Crispy, Flavorful Journey into Asian-Inspired Cuisine
By Tima Gaye
🎥 Unlock the Spring Roll Wrap Quiz Answers
Watch a short video, then test your skills with this crispy & flavourful spring roll quiz! 🥢✨
(After watching, the correct quiz answers will appear below!)
🧠 Quick Quiz: Spring Roll Wrap with Flavours
- What are the three main ingredients for making the spring roll wrapper?
- Which of these can be used as a tasty filling option?
- What keeps the wrapper crispy and golden when cooked?
- Which vegetable adds freshness and crunch to the filling?
- What type of noodles can be used inside the roll for texture?
💡 Tip: Light, crunchy, and full of flavour — that’s the secret to perfect rolls!
🧾 Table of Contents
- 💛 Why You’ll Love This Homemade Spring Rolls Recipe
- 🧂 Ingredients
- 🥢 Introduction: A Crispy, Flavorful Journey into Asian-Inspired Cuisine
- 🥣 Make the Spring Roll Batter Base
- 🎨 Whisk the Batter Until Silky Smooth
- 🥞 Cook the Spring Roll Wraps – Thin, Soft, and Ready to Roll
- 🥢 Fill, Fold, and Roll – Let the Spring Rolls Take Shape
- 🔥 Final Fry – Turn Your Rolls Golden & Crispy!
- 🍽️ Time to Serve and Enjoy!
- 💡 Tips for Success
- ❓ Frequently Asked Questions
- 📌 How to Make Authentic Spring Rolls
- 🥧 Homemade Meat Pie Recipe – Crispy Outside, Juicy Inside
💛 Why You’ll Love This Homemade Spring Rolls Recipe
- Super Crispy on the Outside – That golden, crackly crunch is everything.
- Endless Filling Options – Use whatever you love: veggies, prawns, chicken, or a mix!
- Better Than Takeout – Fresh, customizable, and no weird additives.
- Fun to Make – The rolling process is oddly satisfying and great for family cooking time.
- Perfect for Dipping – Pair with chili sauce, soy-vinegar dip, or garlic mayo for next-level flavor.
🥟 Wrapper Ingredients:
🥟 Wrapper Ingredients:
- 1 cup of flour
- A pinch of salt
- Water (as needed)
🥬 Filling Options:
- Sautéed vegetables
- Shredded chicken
- Cooked prawns
- Glass noodles
- Finely sliced cabbage
🔥 For Frying:
- Cooking oil
🥢 Introduction: Homemade Spring Rolls – A Crispy, Flavorful Journey into Asian-Inspired Cuisine
There’s something truly satisfying about biting into a freshly fried, golden-brown homemade spring roll—the crisp outer shell giving way to a tender, flavorful filling bursting with vegetables, meat, or even noodles. Whether you’re serving them as a snack, appetizer, or party finger food, these Asian-inspired rolls never disappoint.
In this easy-to-follow recipe, I’ll guide you through making homemade spring rolls from scratch, including how to make your own delicate wrappers! From mixing the batter to wrapping and frying, every step is simple, fun, and worth the crispy result.
Perfect for impressing guests or enjoying as a treat at home, this is more than just a snack — it’s a crispy, flavorful journey into Asian-inspired cuisine that you’ll want to make again and again!
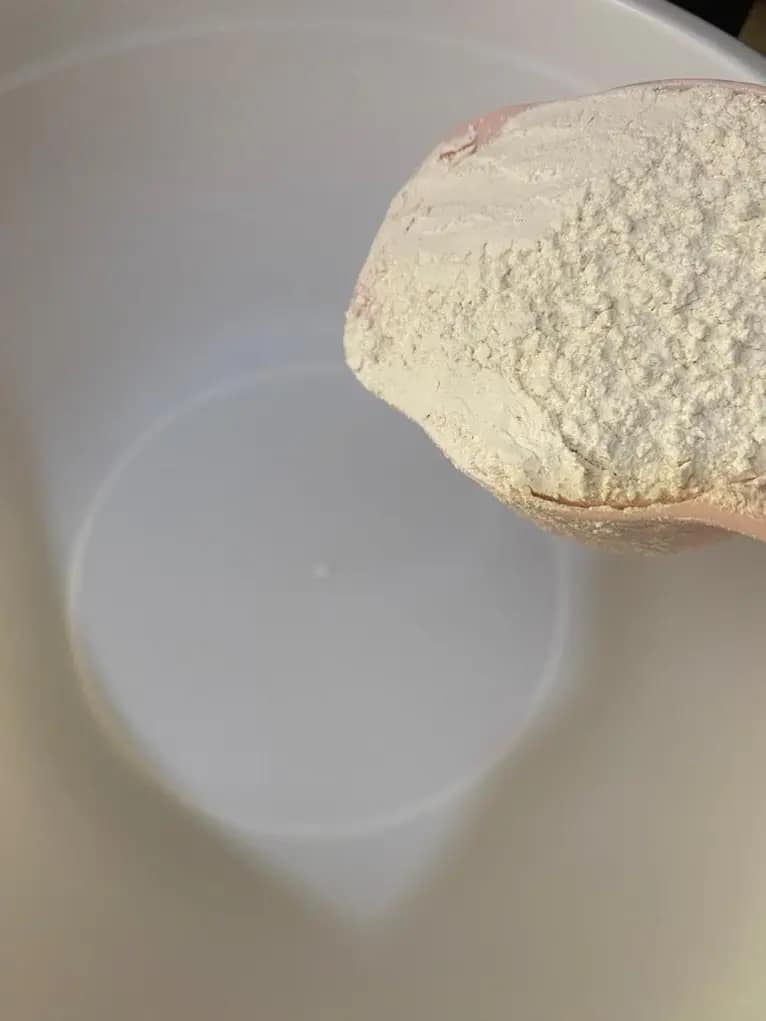
🥣Make the Spring Roll Batter Base
Before the crispy golden shell comes the foundation — your homemade spring roll wrap.
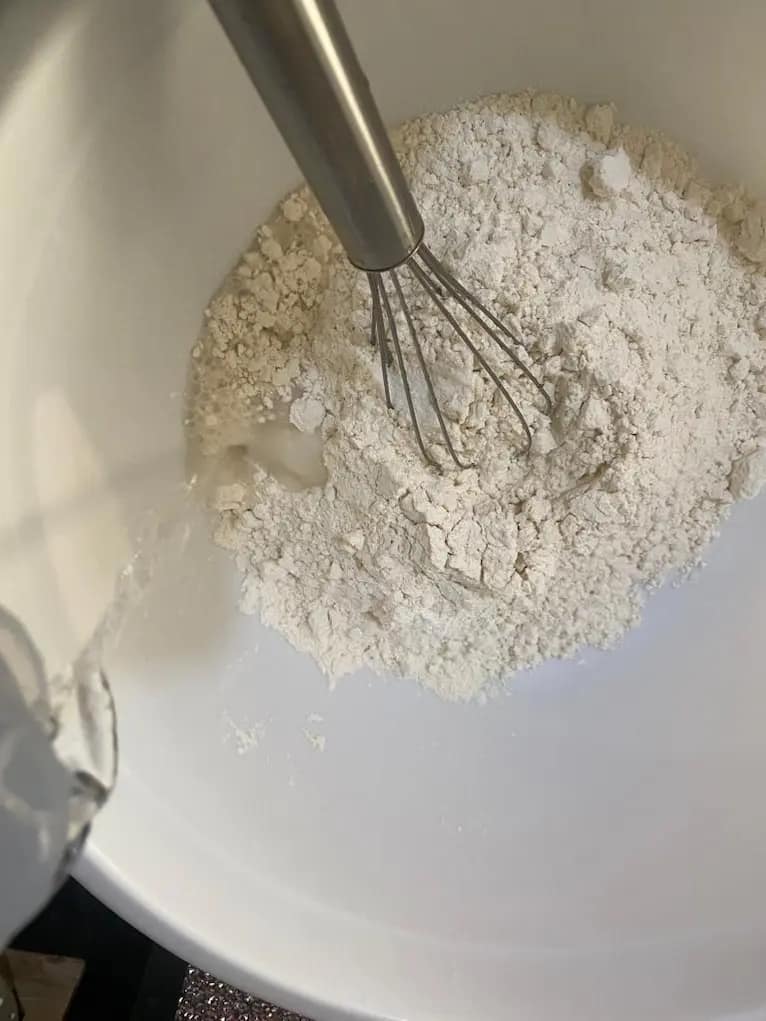
In a mixing bowl, combine plain flour and a pinch of salt. These simple ingredients are the starting point for a wrapper that’s soft, thin, and flexible enough to hold in all that delicious filling without cracking.
Now, begin pouring in water slowly while stirring continuously. Use a spoon or whisk to avoid lumps. You’re aiming for a smooth, runny batter that’s just slightly thicker than crepe batter—neither too watery nor too thick.
👉 Tip: The right consistency is key! It should flow off your spoon in a silky ribbon. If it’s too thick, add a little more water. If too thin, sprinkle in a touch more flour.
Once mixed, let the batter rest for 10 minutes while you prep your filling. This rest time helps the gluten relax, making your wrappers easier to cook and even more flexible.
Whisk the Batter Until Silky Smooth
Now it’s time to whisk — grab your balloon whisk or spoon and stir the batter with gentle energy until it becomes completely smooth and lump-free.
You’re looking for a silky, flowing texture — not too thick and not too watery. The goal here is to create a base that will cook evenly and hold your filling without tearing.
🍃 A good whisk ensures your spring rolls turn out thin, soft, and ready to wrap like a pro!
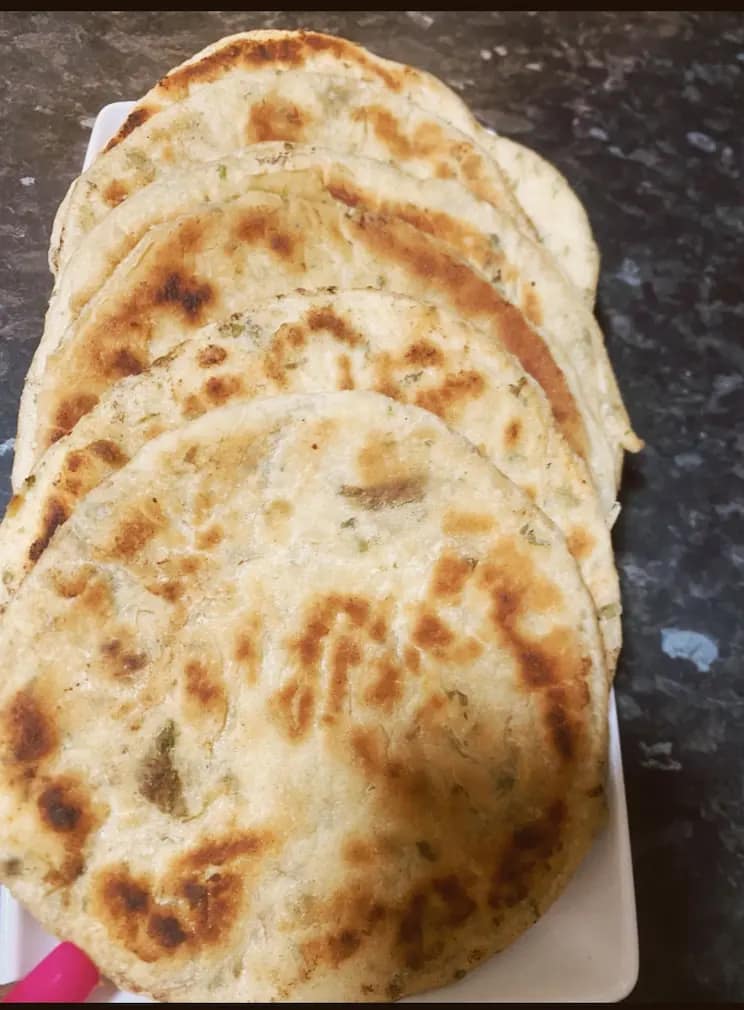
🥞 Cook the Spring Roll Wraps – Thin, Soft, and Ready to Roll
Heat a non-stick pan over low heat — this part is all about patience and precision. Lightly grease the surface using a pastry brush or the back of a spoon. Then comes the fun part:
“Paint” a thin, even layer of your batter onto the pan, just like you would with a crepe.
Let it cook gently for 30–45 seconds, or until the edges begin to lift slightly. That’s your cue! Gently peel it off and set it aside. Repeat until all your batter is transformed into soft, flexible spring roll wraps.
🌟 Tip: Keep your wraps covered with a clean towel to prevent them from drying out while you work on the rest.

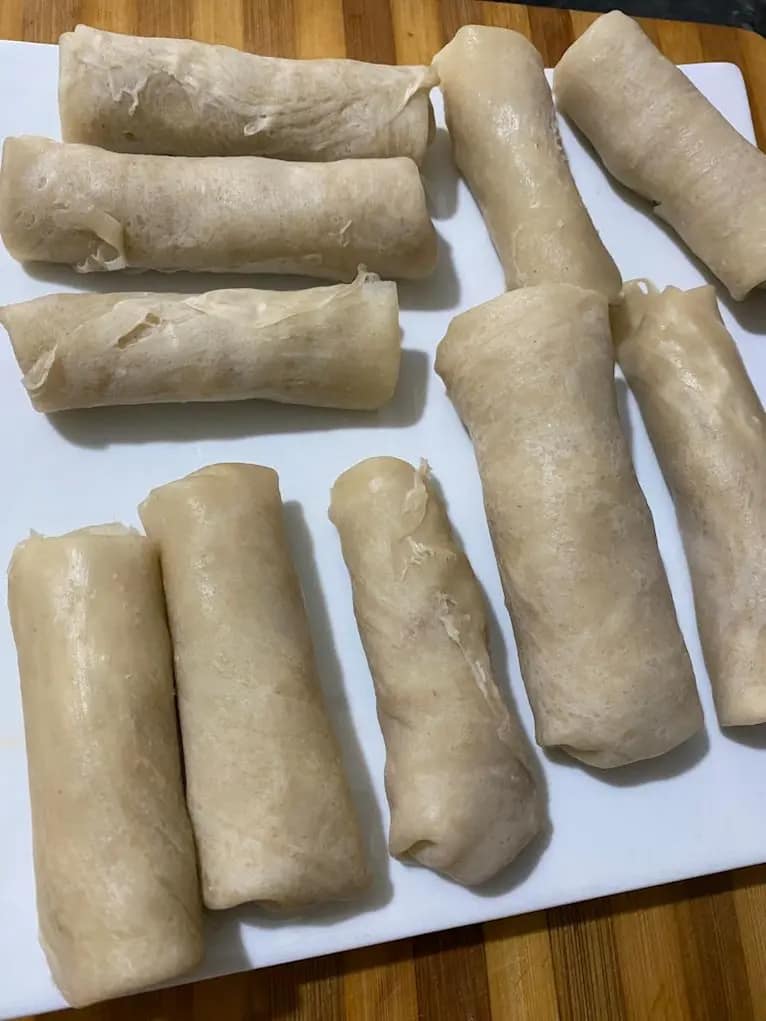
🥢 Fill, Fold, and Roll – Let the Spring Rolls Take Shape
Now comes the fun part — filling and shaping your spring rolls!
Spoon your desired filling into the center of each wrap. This could be stir-fried veggies, seasoned minced meat, or your favorite Asian-inspired mix.
Fold the sides inward, then roll tightly from bottom to top, like you’re wrapping a cozy little package. To seal it all in, dab a bit of flour paste or water along the edge and press gently.
🥡 Pro Tip: Don’t overfill — a little goes a long way and helps prevent tearing when frying.
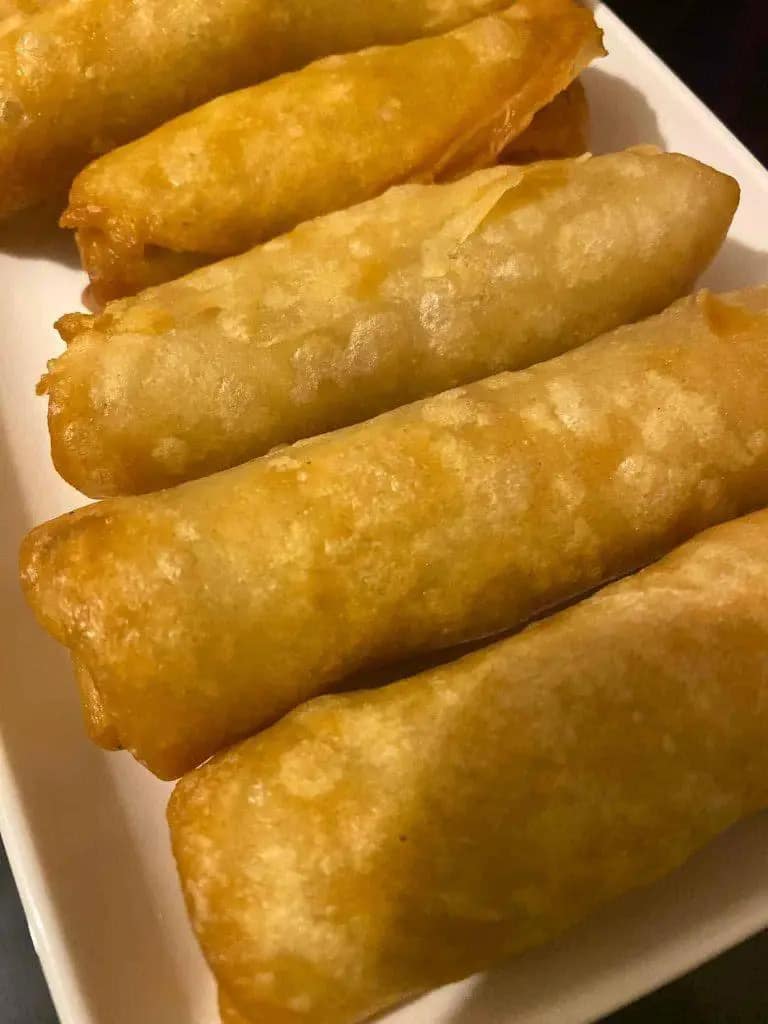
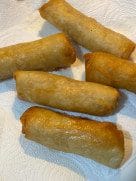
🥢 Final Fry – Turn Your Rolls Golden & Crispy!
Heat oil in a deep pan over medium-high heat. Once hot, gently lower in a few spring rolls at a time—don’t overcrowd the pan! Let them fry until golden brown and irresistibly crispy, turning occasionally so they cook evenly on all sides.
As each batch finishes, transfer the rolls to a plate lined with paper towels to drain any excess oil.
Your kitchen will smell amazing, and the sound of that crunch? Pure satisfaction! 😋

🥢Time to Serve and Enjoy!
Your spring roll wraps are ready to impress! ✨
Serve them hot and crispy alongside your favorite dip — sweet chili sauce, a tangy soy-vinegar blend, or a creamy garlic mayo.
Whether it’s for a party, snack time, or a light dinner, these golden beauties bring a satisfying crunch and savory flavor in every bite.
🍽️ Tip: Arrange them on a platter with fresh herbs or sliced chilies for an extra pop of color and flair!
💡 Tips for Success
- Use a non-stick pan: This helps your wrappers peel off easily without tearing.
- Keep batter smooth: A silky batter gives you thin, flexible wraps—perfect for rolling.
- Don’t overfill: Add just enough filling to roll tightly without bursting.
- Seal properly: Use flour paste or water to tightly seal the edges so nothing leaks while frying.
- Fry in batches: Overcrowding lowers the oil temperature and gives soggy rolls. Go in small rounds for crispy results!
- Serve fresh: Spring rolls are best hot and crispy—have your dips ready before frying!
❓ Frequently Asked Questions
Can I make the wrappers ahead of time?
Yes! You can prepare and store them in an airtight container in the fridge for up to 2 days. Just separate each with baking paper to prevent sticking.
What’s the best oil for frying spring rolls?
Use a neutral oil like vegetable or sunflower oil. Avoid olive oil—it’s too heavy for this kind of deep-frying.
Can I freeze spring rolls?
Absolutely! Freeze them after wrapping but before frying. Fry straight from frozen, just add a couple extra minutes.
What fillings work best?
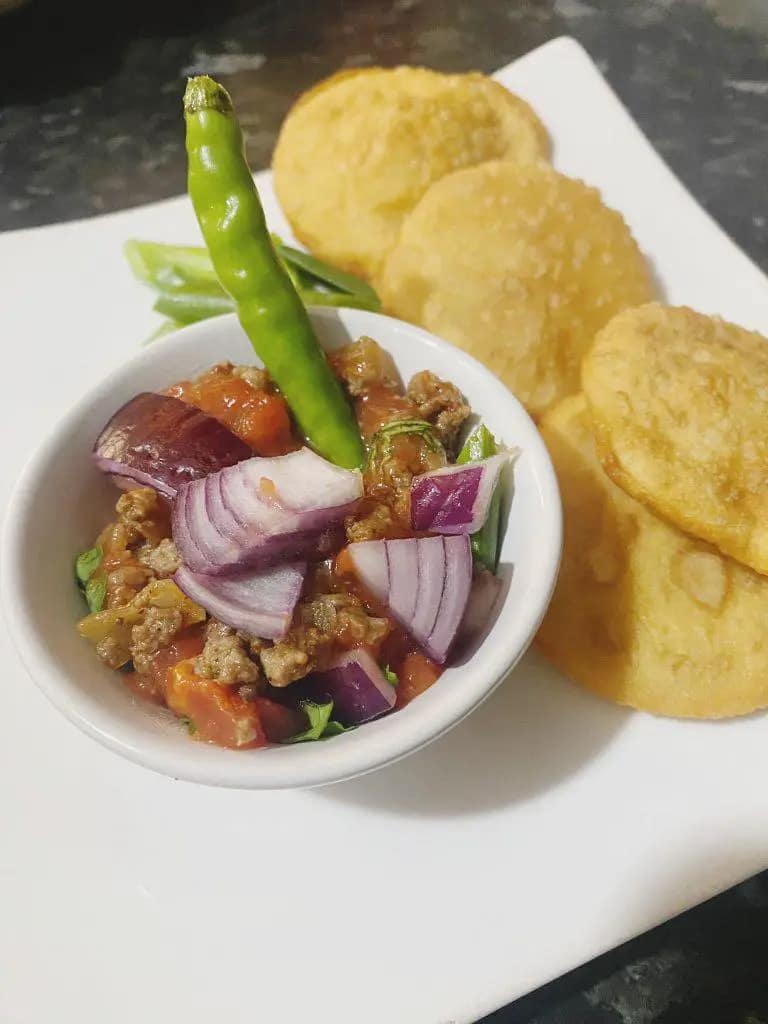
Sautéed vegetables, shredded chicken, glass noodles, cabbage, or prawns. You can also go vegetarian or even spicy beef.
🔗 Want more crispy delights? Check out this delicious guide on How to Make Authentic Spring Rolls for more inspiration!
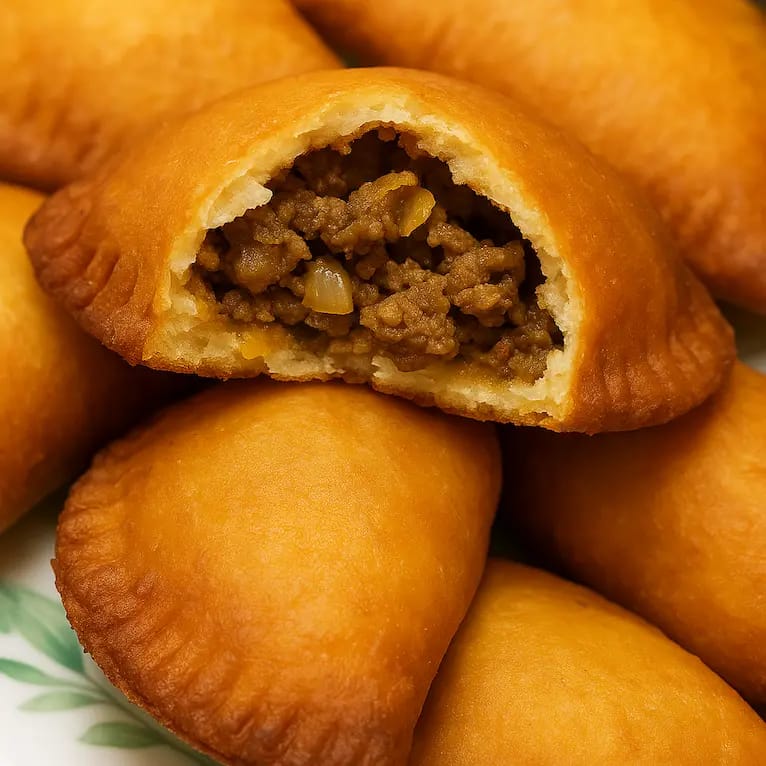
🥧 Love crispy snacks? Don’t miss out on our golden favorite — Homemade Meat Pie Recipe – Crispy Outside, Juicy Inside . Perfect for sharing or keeping all to yourself!
About the Author:
Tima Gaye is a Gambian-born, UK-based home cook and recipe creator. She shares rich, flavorful recipes inspired by African roots and global dishes. Every meal she creates comes from the heart — blending tradition, creativity, and love.
💛 Follow Tima for More Recipes & Videos:
👉 Facebook: Cook with Tima Gaye
👉 TikTok: @timagaye712